Warhammer 40,000 – Death Guard Vs Blood Angels

After a quiet weekend the planned game of Warhammer 40K came round quite quickly after all.  I set a fairly simple table up and we went at it using the escalation mission and a growing number of objective cards to gain our victory points.  Simply put, we had as many mission objectives as the turn number (turn 1 = 1 objective, turn 2 = 2 objectives… etc…).  In a way, as the game progressed, we had more choice of which mission objective to attempt but fewer troops with which to accomplish it!

Coronasan went for a jump pack heavy Blood Angels force with tank and dreadnought support. The jump troops dropping in as reserves throughout the first few turns of the game.  Their elite status making for a smaller force.

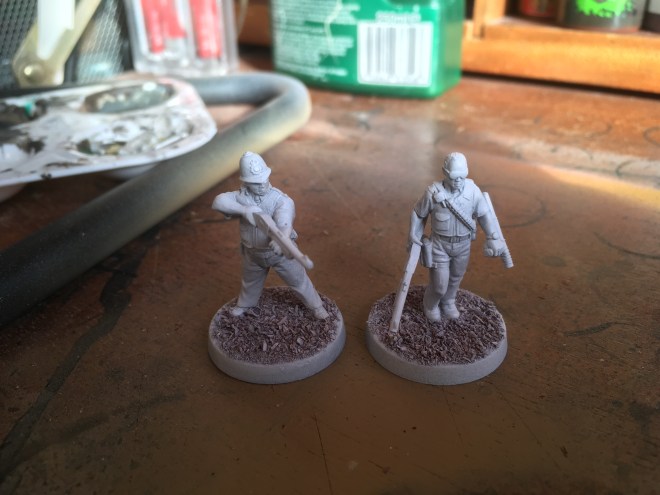
I went for a larger force, comprised of a large number of basic troops. I knew I would be slower on foot, so I took a Rhino APC to transport at least one of my units into the depths of the table if required.  Along with some longer range firepower and a couple of psykers I thought I might be able to pick off a few of the enemy before they had the chance to cause too much of an impact.

With the ability to drop in on any part of the table the Blood Angels were always going to pop up with at least one unit in my rear.

But I managed to keep most of my focus on what was in front of me all the same.

And, after disgorging my transported troopers, I managed to destroy his dreadnought, a unit that also happened to be his only psyker.

One drawback of this edition of the rules is that characters do not join other units.  This means that when setting up charges, Coronasan had to first charge a unit into combat then roll again and hope that the character also made it in.  If not, they would be out of range for the benefits that they were chosen to provide.

Twice in the early part of the game the units made their charges and the characters just sat at the back and watched…

Without their planned benefits, the units were easier to destroy, and the character was left looking somewhat lonesome.

Throughout the game my main problem was that my Poxwalkers (plague zombies to the uninitiated) and Typhus (think lord and master of all Poxwalkers) only managed to move about 4″ a turn.  They were such a slow unit that I would head towards an enemy, only for it to be dealt with before my arrival.

Thankfully my other troops were proving quite resilient.  They stood up to the successful charges of the Blood Angels, in most cases holding their own against the elites.

If my Poxwalkers were ineffective, and had an uneventful showing, and my basic Plague Marines were the solid players of the day.  My Hellbrute proved himself to be the star of the show.  By turn 4 we had a few victory points each, mostly from holding objectives and killing specific units.  By turn 5 he had won the game for me, taking out the Blood Angels main tank for a much needed last victory point.  He was finished off in the end by a late charge from Coronasan’s Death Company, just before they too were destroyed by my slowly advancing forces.

A good game for me, but I suspect that Coronasan will be looking at how to get his charge dice to be more reliable for next time.

Warhammer 40,000 – Death Guard Pregame Painting – Updated

I had expected to have very little in the way of spare time before our planned game of Warhammer 40K.  Our plans for the weekend had been organised a couple of weeks ago and should have consisted of a set of visits to family along with a day trip to the Shuttleworth Collection (a local collection of old aircraft etc).

The more observant of you would have noticed the word ‘should’ in that last sentence…

This plan sadly did not come to its fruition. Mostly because the good lady of the house came down with a nasty chest infection, and up until now she has spent most of her days in bed. Leaving me more time on my hands than I had expected…

As I had very little in the way of a backup plan, other than asking if she needed anything every few hours (nothing but caring – that’s me), I decided to find something else to paint in the shed.

With the army list already selected for our planned game, there was no point in painting another unit or a new vehicle. Also, as I wanted to paint something that would help the list, all I could really do was swap out one or both of the proxied figures for the correct miniatures.

The two proxied figures, that I have used for far too long now, are the Malignant Plaguecaster and the Noxious Blightbringer.  Sadly both of these figures have aspects, on the original sculpts, that I hate with a passion.  This is the main reason that I haven’t gotten round to painting them for so long.

I have not so much converted the figures that I own, as just hacked off the bits I don’t like.  The Noxious Blightbringer figure in my collection has had all those stupid hanging censers removed (oh, how I hate the hanging baubles and smoke effects that GW have started putting on everything).

I think he looks oh so much better as a result.

So Noxious Blightbringer – Done.

He looks a damn sight larger than his proxy (a forge world plague priest) and should be a bit more noticeable on the game table now…

Did I get the second Proxy completed with all that free time?  Not on your nelly. I did cut off the smoking, fly encrusted, spell effect from his right hand though, and I put a nice sensible bolt pistol there instead!

Warhammer 40,000 – Death Guard Prep

It would seem that having a game planned is the only thing that focuses my mind these days. Nothing else seems to manage to get me to do some work. After our recent Steam Wars game, Coronasan and I chatted about what games we had been neglecting for the last few months, and decided that it was high time we pulled Warhammer 40K off the shelf again.

I have a few options when I comes to this game.  One of those options, that I have not used for quite some time, are my Death Guard Chaos Space Marines. As I have more than a few pieces for this army, sat on the shelf awaiting some paint, I decided that playing with this army might help me get a few more pieces done.

As time was short, I decided on limiting the number of new bits to be painted to one large tank. To keep things fresh and new though, I made a concerted effort to get some of the units I don’t play too often, back on a table.

I haven’t played a single game of 8th edition 40K so far with a Rhino APC on the table. So, this time round I decided that this had to be included.  It holds 10 men so my seven Plague Marines could be accompanied by my (proxied) Noxious Blightbringer and Malignant Plaguecaster.  Such wonderful names they have…

A second unit of seven Plague Marines is accompanied by a Helbrute and my newly finished Plagueburst Crawler.

As you can never have enough Plague Marines, a third unit of seven finishes up this 75 power list, along with Typhus and a unit of 20 Poxwalkers.

As for work actually done with a paintbrush, I’ve had the basic colours done on the Crawler for about 6 months now, so finishing it off was only a 45 min job in the end.  Nothing special here other than the liberal use of rust and oxide.

The Rhino was bought on eBay a while back, and was already painted as shown.  All I did was look to see what I could kit it out with in the codex, and then dig through the bits box for the relevant parts.  Here I have added a Combi-Bolter and a Combi-Flamer to the original Havoc Launcher, making this into a pretty tooled up tank in the end…

As ever, this is not likely to be a tournament winning army list. That’s never an issue for me though as it is not why I play these games.  Winning is nice, but the story that the game tells is as much a part of playing as anything else, don’t you think?

Last Days – Slow Progress But Progress Never The Less

Have you ever noticed that with a touch of paint, in this case just an undercoat of simple white paint, the detail on a great miniature jumps out at you and can actually give you a much needed jolt of motivation.

When I bought these figures I knew they were good. Hasslefree miniatures have for as long as I can remember provided great, highly detailed, miniatures. Sadly these have sat on my ‘to do’ shelf for longer than they should have done, but as I was doing some undercoating at the weekend, they got pulled out, completed and basecoated.

Only then did I see the real detail and character in each if them.

These were bought to be used as a modern, zombie fighting, group of survivors for Last Days, one of the Osprey Games rulesets that we picked up earlier in the year.

The first figures included in this lot include the groups selfless leader Kev, with his fire axe. The next is the groups ‘mother figure’ a selfless first aider… with a shotgun…

As my leader is classed as selfless I can only take up to 25% of the force from another keyword selection.  For this I have chosen two ‘trained’ members. A British bobby and his Sargeant.  Two more shotguns should add a bit more firepower to a fairly low tech team.

The remainder of the force are all ‘neutral’ choices, two survivors with pistols and two kids with clubs (sadly chainsaws are not available to starting teams). All basic weapons that they can use to protect themselves from any roaming zombies (and my opponents team).

Seeing these in their full glory should help me to get moving on finishing up this small team.  Hopefully…

Steam Wars – Airborne Assault Mission.

A first flight for the Assault Barges was always going to be on the cards.  From the point of starting to construct them, the project was destined to trigger an increased desire to play Steam Wars and get a few of my Naval Marines on the table.

The scene was set for the Navy to come up against one of Coronasan’s armies over the green hills and lush grass of an alternate Steampunk Earth.

The Mission was to get to the objective within 6 turns and what better way than to fly there, laden down with tough US Navy Crewmen and Marines.

Supported by a scout car and a pair of Gyrocopters it would be hard to slow their advance, or so I thought…

The objective was the fields behind the farmhouses at the other end of the table.

The people trying to stop me however, were actually not people at all. Coronasan took this opportunity to bring out his Mechanica Army for the first time and show off their true might.  The force was made up of all manner of robotic and mechanical marvels.  All led by a man in a flying iron suit and a mad scientist with accompanying hunched lackey.

All they had to do was hold the farm houses and stop my foot soldiers from getting boots on the ground behind the buildings.  As my forces advanced slowly into the fields in front of the houses, the Mechanica troops fanned out, ready to start taking shots at the Skyships.

It wasn’t long before their fire had caused enough damage to force me into disembarking my marines from the first Assault Barge.  She had taken almost all she could and I did not want her going down with all hands still onboard.

The second Barge was not far behind and as she unloaded her human cargo, they started the job of engaging with the strange robotic troopers.  The first casualties fell quickly and the confidence of the Naval Marines rose with such easy kills.

In a fit of overconfidence the flagship, laden with specialist assault troopers, also disembarked the majority of its forces and took out a further unit of robotic troopers.

It was at this point that the first of the assault barges, having safely delivered its charges, was finally destroyed by the Mechanica Fighter jets.

Being almost within spitting distance of the objective, confidence within the Naval force was riding high.  Then came the return fire of the robotic ground forces.  Not strong enough to destroy the well protected and dug in marines, it did however, start to have an effect.  The first line troopers in the centre became pinned and their momentum was slowed as they took cover.

In hopes of encouraging them forward the Command squad forged ahead in their skyship, planning to either draw their troopers along behind them, or take the objective themselves.

In the closing moments of the mission, as the clock was running out, a single Gyrocopter forged ahead. Unable to take the objective itself, its aim was to clear the way for the ground forces to move in.  After spending all game without a viable target, and surviving a hail of fire as it flew over the enemy forces. It unloaded its payload of bombs at the robots defending the objective…  And missed…

Needless to say, the Assault troopers were still stalled, just too far from the objective to make a difference.  Marine troopers began to fall on both flanks as the robotic forces pushed back and, in a last ditch effort, the command team rappelled down to claim the objective themselves.  The only chance the Navy had of completing their mission was to assault the robots hiding behind the last house.

And that was the moment I failed to capture on film.  Why you might ask?  To the great surprise of an exhausted audience, the robotic troopers managed not only to received their charge but managed to wipe their attackers from the face of that fair land.  Blood stained, but relatively unscathed, they had held the objective against a plucky effort to eject them.

All in all, this proved to be a great game, and a very cinematic climax to an eventful mission.  I will look forward to the next time my Barges have the opportunity to fly to war…

Steam Wars – A Game Planned And Some Barges Decked Out

When you come to read this I will have likely already had my first game using these Assault barges in Steam Wars.  I plan to try a full on airborne assault (well, almost fully airborne as I don’t have an airborne transport for any of my steam tanks as yet – Any ideas, on a postcard to the usual address).

When I started building these Barges I guessed that I would get six or so figures onboard if I also wanted a deck gun in place.  I can actually get two units of five marines, or ratings, onboard while still having room for a deck gun (I need to get hold of a few more crewmen that can be based on little 15-20mm round bases so as to not take up too much room.

The Oxford can take a much larger complement of marines.  Here she is, loaded with two units of six heavy boarders, as well as a large deck gun and a five man command squad.  Even will this lot onboard she could take another one or two units.

The second Barge matches the original with ten men and deck gun.

The main assault force totals 37 men (7 units of 5 or 6 men) and their three deck guns.

To support them, I have also allocated my two Gyrocopters to the force. One is tasked with eliminating armoured ground targets with its bombs, the other is tasked with providing close air support, as I know Coronasan will be bringing along plenty of fighter planes.

Finally the force is completed with the inclusion of an armoured scout car.  Fast moving, and tasked with  providing a level of mobile cover for the infantry when they make their initial assaults.  It also supplies, not only a light antitank gun, but also an additional AA capable machine gun to the force.

A fairly small force, due to the cost of my airborne carriers, I am hoping that their increased flexibility might make up for my lack of armoured vehicles.

We shall see how I fare…

Steam Wars – Assault Barges Completed

Once everything was dry it was time to add the 10 or so decals that would match the Oxford and proclaim the Barges as officially drafted into my Steam Wars Navy force.

Although these are MDF kits, the method of applying decals is no different to a standard plastic or die cast kit.  Once you have painted the MDF it is waterproof, and the surfaces are fairly flat. As long as the placement of your decal is not over an edge, or seam in the kit, you should never have any issues.

I would suggest a coat of spray varnish when it is all completed, to seal in the decals (I find it almost seems to dissolve the decal into the painted surface). Doing this ensures they do not lift off when handling the model during game play.

10 decals later and the finished effect is quite nice.

I had not noticed until I left them out to dry but they now cover a sizeable chunk of my gaming table.  Thats a 4 foot wide gaming surface covered when arrayed nose to tail…

I just have to profile them up for Steam Wars and then talk Coronasan into a game later this week.  They need a chance to hit the gaming table, and show me their worth.

Steam Wars – Assault Barges WIP

When last seen, these Blotz MDF Aether Launches (Assault Barges in my world) were built to the point of painting, and outside the weather was very wet and very windy.  Not ideal base coating weather if you are planning on using spray paints to speed up the process.

Painting the barges while they are still in parts allows me to cheat a little, as it allows me to leave the decks with the natural MDF finish.  As the decks are simple wooden planking by design, it will look just fine, and save me some time when finishing off these models.

This weekend I did manage to get outside to spray. I managed to find a brief moment, on Saturday, when it seemed dryer and the wind only gusted every other time I sprayed paint at the models. As all I needed to accomplish was a coat or two of white to the engine housings and the underside of each hull it was not too traumatic a time.

I then had to wait for the spray to dry so that I could get some colour on the metal edges of the engines, hull and the captains shield.  My collection of metallic marker pens again come in handy for these details.

Being an organised chap I managed to sand coat the bases while these were again drying so as to get all parts to roughly the same stage.  I also pulled out the Oxford class skyship, that I have as the flagship of the army, so that I could make sure they fitted the original paint scheme. The placement of decals on the new Assault Barges would also be dictated by this original model.

Steam Wars – More MDF Skyships

While I was tinkering with other MDF kits in the shed, I thought it was about time that I tried to get a couple of other kits off the ground (pun intended).

At one of the shows I attended last year I managed to get these two Skyships from the lovely folks at BlotZ.  They were £11 each and well worth the money in my opinion.  I already have one of the larger Blotz Skyships (my Oxford Class Patrol Skyship).  These are what they call their Aether Launch however I am likely just to call them my Assault Barges.

It is a really easy task to build these kits, but I don’t plan to paint these in the same way as my recent MDF houses.  These are going to be done in mostly white or bare wood. With that in mind, I don’t need lots of different parts painting up beforehand.  I can easily get away with just spraying the undersides of these, along with the hand rails, engine blocks, funnels and fins, in white – as I did my original Skyship – and then, when its dry, I can go over the metal work with a bronze metallic marker pen.  A couple of other colourful details and a few decals and I should be almost finished.

Before all that, while I am waiting for the glue to dry, I can try out the deck plans of these barges to see how they will load up with figures.  These will be part of my Navy Marine army so please excuse the use of Martian Sanwar Slaves for measuring the crew complement.

These barges have very long decks, so I am hoping that they will be able to fit a deck gun at the front and still have plenty of room for for Marines to be transported to the thick of battle.

By my guess, at this point, it looks to be a maximum of about 10-12 infantry that will fit that deck length. However, if I want to bring that deck gun along, I might have to limit things a little.  I might only be able to get a deck gun onboard with a unit of 6 infantry and maybe an officer or two to motivate them to jump off and attack.

Decisions, decisions…

More MDF Houses

So, a while back I started a new MDF kit. Surprisingly, I managed to get it almost finished in a single evening.  The second kit was ready to start but I never got around to it as I was quickly drawn into something else…  As usual…

These kits look like a lot of bits when you start but they are easier than you would think.  Especially when you remember to paint (or ink in my case) all the parts before you put them together.

They are both now completed to nearly the same stage and I really need to start thinking about how I finally finish them off.

The different kits are made up from many of the same parts. So sections like the roof are effectively interchangeable

I still need to paint the second roof, paint the window frames in a contrasting colour and add a door knob or two.

I should also try to add some weathering as they look a little too clean at this point.  My dirty paint water pot and a small sponge should give me the right level of grime without getting too many brush marks or tide lines.