Steam Wars – Martian Underground Base Entrances

The builds on these kits were finished, to this stage anyway, back at the start of December.  Due to me having a bad month, along with the usual family commitments that Xmas and the New Year bring along, they haven’t progressed any further so far. I do have all the needed plans and parts ready for when I get a good day to spray a base coat on them. After that they should be quite quick to complete.

These two smaller entrances will suffice as the access points for cephalopods and their slaves.  They are, however, really not a realistic size for allowing access by any Tripods or other vehicles. I therefore need to find, or design something, to represent these entrances in any narrative games we play.

Currently I am open to all ideas but I have played with the idea of a sloped hangar style opening with a set of sliding doors, or a pop up style lift tube (to keep things in line with the ’round’ look of the other scenery items, like my craters).  I need to get a few sketched ideas on to paper and then see what Coronasan can design and cut in MDF…

Steam Wars – Martian Cephalopod – Hidden Base Entrances

Yep, you guessed it still no change in the little green skinned fella pile.

I have been productive though! I recently bought a couple of these… (actually one of these Retro Americana bunkers and one of the original Burrows and Badgers sets).

I cant see any real difference in the way these are designed.  Only that one was planned to be more ‘buried looking’ than the other…

Scale wise they will work well with my Steam Wars 28mm Martian force. I plan to use these two on the red Martian earth terrain set as their entrances to the secret subterranean base

With a slightly buried in cracked red earth look, and overgrown with some Martian red weed, they should work fine.  I plan to add a small light or control panel over the square hole to the left of the airlock.  The hole was for a very retro American post box that just wouldn’t be found in a secret Martian Base.

But mounted on a small MDF round, and suitably based and weathered, it will fit in perfectly outside of any number of my existing houses.  Never throw anything away…

Fistful Of Kung Fu

I may have been spending less time in the shed recently but I have not been idle.  We got a game of Fistful of Kung Fu in recently. Yes, we are still trying to get a number of games from our ‘loved but neglected list’ played before summer gets too far along.

FFOKF benefits from a wide selection of scenery items.  Your protagonist (hero, leader, main-man (or woman)) usually gets to do an awful lot of actions in your opponents turn with this game. While the mass of minions that he brings along with him will only act in their own turn.

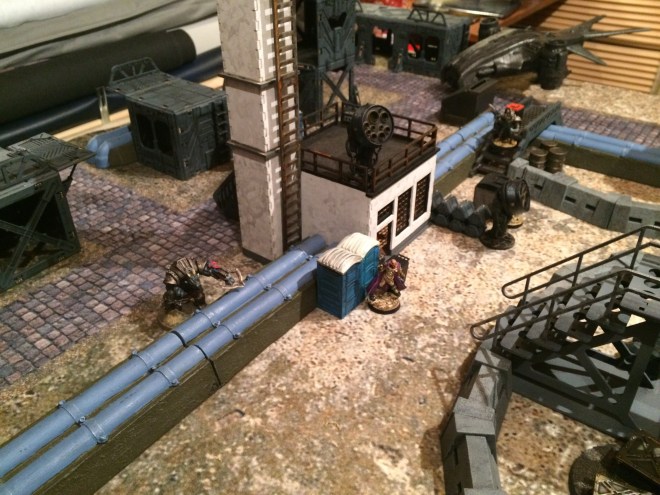
Lots of scenery protects him while he runs everywhere, and does everything he can, but it also adds some cinematic elements to the game. This is because he can activate various scenic items for some humorous effects (e.g. tip a blue portable toilet over on to an enemy figure…)

Its also a good excuse to get a Poundstretcher train set and a green plastic Thomas the tank engine crane onto the gaming table…

Finishing Touches And New Ideas 

After such a productive time I am starting to wain again.  The last batch off the painting table are great.  I am very pleased with the armoured division that now supports my naval force.  I will have to put up a page for these guys as they deserve their own place as my first completed ‘large army’ since starting this blog.

I say completed, but I still have lots of unfinished and undercoated figures to add to the force.  Completed in this case means fully playable, with extra options.

I have what could be called a sizeable force.  More than can be fielded in an average game.  I would say that that is something quite astounding by my standards.

As I briefly pause to reflect on my Steam Wars painting spree I can see what should be next up on my ‘painting’ queue.

I finished this small shop recently, but it left me thinking it needed something more before I could call it done.  That something turned out to be signage…

I have decided to try making my own decals…

The images above are test prints on plain paper. They give a good impression of the size if not the colours that will be used.  I suspect that the final items will not be far off from what is shown.  I may need to add a sign board to the hotel, but the awning and parking sign are meant to be painted on canvas or brick, so will have the details behind, left to show through…  As the Decal paper I have is A4 in size I might need to get a few more designs lined up before I finalise my images and print them out.

So, what else do I have that needs a sign or image printing on it.  Anyone know a good source of Martian tripod markings?

Wish me luck.  I will update my progress when I get the first test prints completed.

New Shop Open For Business, Almost!

So, the little shop I added to the collection has now had some attention.  Its had the usual paint job of artist inks and black sprayed roof.  This matches the other Sarissa Precision CityBlock buildings in the town so will look nice next to them on a table.

Oddly we are not playing games that feature these buildings (pirates tend not to frequent the shops in my Victorianesque town) so I guess it will have to wait a while before it gets used in a game.

I have not given it a sign as yet. Not quite sure what shop type it will eventually become.

I have added a white front that can be repainted as required if I ever make up my mind.

The awning helps to make it more generic (and hides the actual shop sign anyway).  I have pondered adding a decorated/ scroll work sign to the awning itself, but am confident that I have NOT got the skill to do this by hand.

Related imageRelated image

Something like the above would be nice with a brand or name like ‘Miggins Fine Sausages’ (just an example)…

Not sure how to do this yet, but those fine fellows at The Lead Adventure Forum have been helpful with a number of ideas.  I have taken some of that advice and now have, on order, a sheet of waterslide printer paper.  When I finalise a design, I will try printing it out and apply it.  It has been suggested that a satin or matt sealing spray will hide the more glossy look of the decal and help it blend in.

Doors have been painted since these photos as well, so all that is left is the signage then it can go away for a few weeks until our pirate phase falters.

Unless our next gaming distraction goes further out west and those pesky cowboys come to a very different looking town.

Weathering While The Weather Is Bad

With the addition of the Small Shop from Sarissa Precision shown previously, I realised that I had 4 buildings now sat unpainted on a shelf.  In fact all together they no longer fitted on the shelf. Something had to be done, or at least started…

So, instead of finishing off the small shop as I had planned I started all the others…  At once…  Why plan these things when unplanned actions lead to so much discovery…  (Must stop using so may … Its starting to look like the blog is covered with rabbit droppings…)

The smallest and most detailed is a Charlie Foxtrot Stables that I picked up with the useful advice that spray painting with grey then white (from differing angles) would give me a base coat while retaining most of the detail.

It worked well, so I tried it again on the second building. This was the Cricket Pavilion by Warbases.  Both these buildings are designed to represent wooden huts which I picture as being as whitewashed and weathered.  So that’s what I went for.

Both came out ok. I probably need to add more detail and pick out some areas with some colour as the white look is quite stark.  Some weathering to the lower half of the building added some colour variation but I need to look at what colour to darken that staining to as I think I need to go over the lowest planks with something to represent their damper foundations.  Maybe some moss or grass at ground level would help finish them.

The third building is the Grand Library from TTcombat.  This was built just after Xmas so has been painted quicker than most things in the shed.  I went for a slightly different approach here and like the finish so far.  Lots more to do though…

Grey then white allowed the detail to show up.  Then, a light spraying of the grey to the lowest edges with most of the spray focussed off the building and on the base board it was stood on.  Some more dilute ink washing helped to bring that shadow effect up further.  Again more detail is needed. Doors and steps in a contrasting colour maybe.

Now that they are all started, lets see how long it takes me to finish these off…

Town Has A Couple Of New Additions

As I have been avoiding painting to some degree, and building a few kits and models to pass the time, I thought I would try to get the last of the MDF buildings I own up and finished.  If I am honest, painting this one would be easy as it is only likely to get a couple of ink washes and details done, so no spraying would be involved.

A good supply of wood glue and rubber bands however, are a must with these kits in my opinion.

Sarissa Precision have expanded their City Block range greatly since I bought their first Residential buildings.  These now include their large Corner store and some new Terraced shop fronts.

The one above is a nice example of what can be done with MDF and contrasts well with the earlier buildings. You can see how the company have begun to add more detail to the buildings since their first few designs.

My corner store was refitted late last year as a hotel with a nice prominent sign. However, its internal layout meant I had a small stair and entrance that was not part of the larger building.  In my mind this had to have a reason for being there.  So I scoured the web for shop signs and good ideas.

In the end I found a supplier of pin badges of all things! They sold me a barbers pole badge in about the right size for this scale.

Hence forth this small corner of the corner store hotel will be known as ‘The corner store hotel barbers’

Well, until I can think of a real name for it.

Looks good to me anyway…

Now, I just need to paint up that store front and we are done!

More Sci-fi, More Walkways

It seems a long while ago that I bought some of Sarissa Precision’s Gantries. It was at a salute a few years back if I recall correctly.  They didn’t have all the bits I wanted so took my order there and then and sent the missing items post free as soon as they got back to the office…  Great customer service and great products.

This month I finally got round to painting them… and then realised that I had not thought through the collection of pieces as well as I might have done…

The set I picked up could only be made up into long runs or a T shape and worse than that, I had 2 stairways and 3 ends to my gantry…

So I bought some more…

Simple painting again. Black undercoat spray to start with and then uniform grey sprayed only down the middle of the walkway and roughly under the supports.  Lots of black remained on show and left shadows and light with very little effort.

The set now makes up solid blocks of terrain as well as long runs with corners and entry points in a number of places.

One small issue was my realisation that the base plate of the stairs is off set and only fits one way (not the way I stuck one of my stair sets…) Oh well what’s one more trip hazard when the whole walkway already has a hundred 1′ wide holes in it 🙂

Looking better…

and more versatile…

That’s actually one job that has sat in the shed, unfinished for 2-3 years, now finished..!   And it wasn’t even on the To Do List…

Success at last…

At Least I’m Doing Something – More Rogue Stars

Skirmish games appear to be the way forward. At least in my small world anyway.  Smaller figure count games are great for quick start up and often provide fast paced, effective and cinematic games.  Most of what we do these days is smaller armies games.  Even Coronasan’s Steam Wars (probably the only big army game I play at the moment) fields units of only 5-6 figures.

Rogue Stars is just like that as it offers a fast paced small force skirmish game that is also quite detailed and characterful at the same time.  I know its not everyone’s cup of tea but the detailed character building makes each and everyone of your crew into an individual.

At first read it appears a very complex game for only about 8 figures to a table.  the many smaller rules and layout of the book can make it seem overly rules heavy.  My advice is to hold off judging it until you have tried it out though

We have tried a few games now and have found the system to be more intuitive than we expected.  A good cheat sheet with a few of the more often used tables copied out on it is a must though.

We have played games where we just go out and try to kill each other, try to steal wheelie bins full of new tech from under our opponent’s nose and the usual sort of hold terrain while trying not to get killed type games.  All work well.

As we look forward to our next games I have rooted about in the back of the shed for all those Deadzone figures I collected and never got round to painting.

Smaller scavenger types good at hiding and stealing Tech…

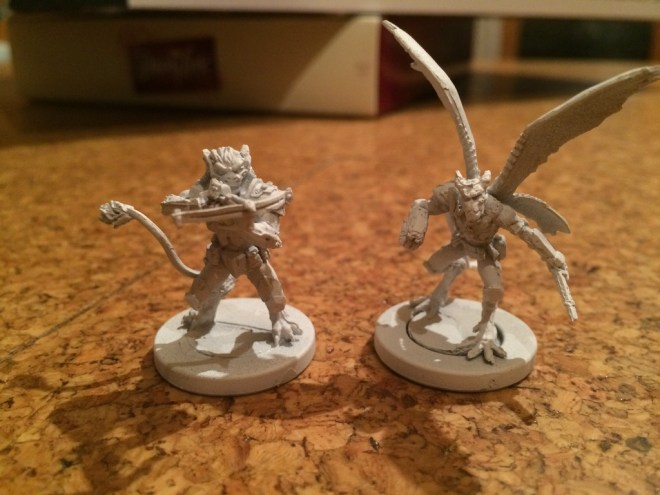
More aggressive alien types.

These are my first choices so far, obnoxious blaster wielding alien, quiet spoken tank like bodyguard, tech savvy sniper girl.  Whoever said stereotyping was a bad idea is wrong.

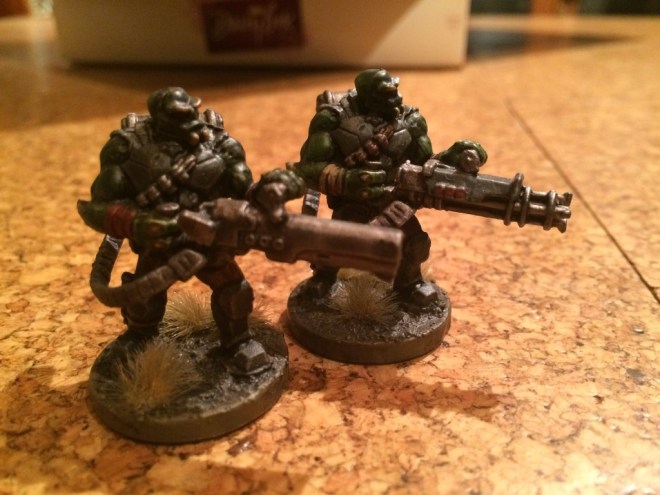
Gutteral, gruff voiced brutes (only because their guns are so loud and they shout all the time…)

Fast, sneaky and likely to dodge in and out of cover given the chance.

Now, what else can I find..?

Looking Back At Some Unnoticed Successes. The Town Has A Touch More Colour. 

Looking back over the year I have got more done than I thought.  My MDF buildings got a lick of paint (well, ink anyway).

These buildings (mostly from Sarissa Precision’s city block range) have been used in a majority of games but have never been finished off.  Mostly because the base material colour was almost a match for the sandstone fronted blocks they represent.

The bases and backs have always been in need of a touch more colour though.  A couple of balconies (or fire escapes) add to their versatility (and make them a pain to pack away again).

In fact I went all out and bought 2 types of fire escapes and a smattering of other items at the same time (It was at the Derby wargames day I think).

A second storey for the corner shop added another level of height to the table.

And all of a sudden we were playing on a number of height levels (lots of escape routes and sniper perches were to be had).

Main street had taken on a little more colour and looked all the better for it…

The corner shop was upgraded with its extra floor and fire escapes to…

…The ‘Grand Hotel’. With its smaller side door soon to become the entrance to ‘Bobs Barbers’ when a small barbers shop striped pole I bought turns up.

Two subway entrances (yes two – if you go down one you have to come up another or it looks like you got lost…) were added to the collection this year.

Council green and grey paint job and signage done

Some small portable toilets (unlikely to be seen in a Victorian town but I liked them so I bought them…)

Warbases curb stones and paths were painted and rebased to hold their positions better and tie in with the newly painted city blocks.

All in all its come together quite nicely.  Shame I didn’t realise how much I had really got done.  Feeling less like I wasted so much of my time this year now…