Steam Wars – Martian Underground Base Entrances

The builds on these kits were finished, to this stage anyway, back at the start of December.  Due to me having a bad month, along with the usual family commitments that Xmas and the New Year bring along, they haven’t progressed any further so far. I do have all the needed plans and parts ready for when I get a good day to spray a base coat on them. After that they should be quite quick to complete.

These two smaller entrances will suffice as the access points for cephalopods and their slaves.  They are, however, really not a realistic size for allowing access by any Tripods or other vehicles. I therefore need to find, or design something, to represent these entrances in any narrative games we play.

Currently I am open to all ideas but I have played with the idea of a sloped hangar style opening with a set of sliding doors, or a pop up style lift tube (to keep things in line with the ’round’ look of the other scenery items, like my craters).  I need to get a few sketched ideas on to paper and then see what Coronasan can design and cut in MDF…

First Foray Into A Neglected Shed Space

After sweeping away the cobwebs at the door, and running the dehumidifier for a while along with a small heater. All I had managed to do was awaken the hibernating lacewings and other crawly things that share the shed with me. In hopes of maybe evicting them before they start to annoy me I thought I might have a tidy up and check the state of play of the ‘To Do’ pile.

Unsurprisingly it hadn’t gotten any smaller while it had been neglected…

As I had been off my rhythm for some time I thought – start simple – so I grabbed a couple of scenic items from the shelf and sat down to try to get my mojo back.

Bronze dry brushing over silver base coat (why I didn’t just paint them bronze at first is beyond me at this point). Oxide green wash in some creases here and there.

Dirty up some MDF plinths (supplied by the talented Coronasan) and I have my first successes for this new push at getting back into the swing of things.

One an Alien hero (the pilot from my martian flier if I recall correctly) and the other a simple space marine in a suitably static pose.

Well, Its a start…

Steam Wars – Martian Cephalopod – Hidden Base Entrances

Yep, you guessed it still no change in the little green skinned fella pile.

I have been productive though! I recently bought a couple of these… (actually one of these Retro Americana bunkers and one of the original Burrows and Badgers sets).

I cant see any real difference in the way these are designed.  Only that one was planned to be more ‘buried looking’ than the other…

Scale wise they will work well with my Steam Wars 28mm Martian force. I plan to use these two on the red Martian earth terrain set as their entrances to the secret subterranean base

With a slightly buried in cracked red earth look, and overgrown with some Martian red weed, they should work fine.  I plan to add a small light or control panel over the square hole to the left of the airlock.  The hole was for a very retro American post box that just wouldn’t be found in a secret Martian Base.

But mounted on a small MDF round, and suitably based and weathered, it will fit in perfectly outside of any number of my existing houses.  Never throw anything away…

Steam Wars – Gyrocopter Number Two Finished

Yes, I know, I should be painting little green things…  Some times you need to win a bit of motivation back by getting a couple of quick and easy successes under your belt though…

Here I present, for your viewing pleasure (or not), Gyrocopter Number Two.

Mounted on the wobbliest thin plastic rod that I have (note to self – buy more Perspex rod – next pack needs be much stronger) and flying high over the green and pleasant lands laid out in the shed.

Armed with chin mounted generic weapon (could be flamer or MG)

Ah! There it is, almost hidden from view in full flight…

Oh! That’s worse, looks like they mounted a shower head under the cockpit

Ah! Better again…   Hmmn, strange as to how they both look better with the copter in a crashed pose.  Hope that is not a sign of things to come.

And proof that photos should not be taken in a cold shed after a couple of shots of anything warming.  Look how crisp the focus is on that stagnant pool!

If I get any more done on those little green men I will let you know…

Steam Wars – Gyrocopter Number Two

There is always plenty to distract me from the job at hand in the shed.  When I am supposed to be painting Greenskins I end up starting work on a second Steam Wars Gyrocopter.

‘Starting work on’ might be a slight exaggeration.  This little Ironclad Miniatures Gyro was started about a year ago…  Built and undercoated/ basecoated then parked when the next new thing came in the door.  The pilot was done only a couple of weeks ago when I was prepping for our big weekend game of Steam Wars.  The gyros were dropped from the army list so this one didn’t get finished when all the other bits were getting completed.

As it has been front and centre in an almost started/ almost finished state for a week or two now, I decided to just get it done and out of the way…

These come unarmed and my first, you might remember, has some bombs stuck firmly to its sides.  This one will be a slightly more versatile model when it is finished.

A small generic MG style chin mount allows me to profile up a range of ranged anti infantry weapons.

A small rocket pod could be used against light vehicles or as more anti infantry firepower again.

Both are magnet mounted so I also have the option of leaving it unarmed.  In this format I can use it as an airborne artillery spotter, at a very much reduced points cost.

The chin magnet will allow for later weapon additions as well, if I find that an alternate option is needed (maybe a rotating Buzz Saw that I can cut down Zepplins with…)

A quick clean up and splash of grey paint and these will be done (as long as I don’t get distracted again…)

Warhammer 40,000 – Gretchins And Loads Of Green Ink

The more vigilant of you may have noticed these boys in the background of my last update.  The Ork Kill Team box comes with 5 Burna Boyz in it but a full kill team needs a few more bodies to get it up to points.

Therefore, I have gathered together some eBay finds, and a few old miniatures from various bitz boxes, in hopes of having enough greenskins to get a decent team together.

I suspect that these Gretchins are the least likely troop type to be included in my first team, as every dead figure adds to your chance of failing a nerve test.  I haven’t painted any green skins in the last few years so I am definitely out of practice using green skin tones.  These guys should make a great set of test figures to get a colour pallet planned though.

I don’t want to use the standard Ork green or Goblin green skin tone for these guys.  I see them as being modern tunnel dwellers (do Orks and Goblins lose their ‘tan’ if kept out of the sun?). Either way I want a lighter, pasty green, for these guys! No matter what the lore says.

I have to say that the level of detail on these guys is excellent.  Not too many items to paint but easily defined after a green Athonian Camoshade wash. Teeth, fingernails and toenails all present and correct…

I had best get going with these guys as Coronasan has already had a test game of Kill Team and I suspect it will be high on our list of games to be played over the winter.

Warhammer 40,000 – Galvanic Servohaulers, Or Just A Couple Of Old Tractors And A Crane.

An age ago it seems, I purchased the Ork Kill Team Expansion from my local game store.  In said expansion were 5 Burna Boyz and a set of scenery pieces that appealed to me almost as much as the Orks.

The scenery has now been made up, and all it was ever going to be getting was a very simple paint scheme. I didn’t, therefore, worry too much about the need to start the painting while it was still part made. In hind sight this may have been a better idea.

Although most of the parts in this set have all the details on easily accessible areas, and a lot of detail is included.

Sadly, when constructed, some of the details are hidden behind tracks and wheels.

In some cases the tracks themselves are hidden by other parts…

However it turns out, I suspect that I will get enough detail painted to make them look passable.  I may even look to the possibility of not painting some of the details, as the level of ‘grim dark’, in the form of skulls and cogs, is almost too much in some parts.

A couple of the smallest pieces in the set have plenty of character and no lack of detail themselves.  I have to admit that these pieces are likely to get used more than the larger items, especially as usable items in our games of Fistful of Kung Fu and such like.

Steam Wars – The Big Weekend

As if by magic, the big weekend number 2 was upon us.  Steam Wars was the planned game, and it was a game that we expected to take some time.  All the women folk were away and the curry was bubbling away on the stove.

Nothing but a cat or two would be able to distract us!

Coronasan had not been idle while I was prepping my forces.  He had been building and painting a mix of MDF buildings and sorting out a 2 foot sea section to add to his fancy new harbour boards.  In a week he had also managed to build a selection of harbour jetties and walkways that would enable my Navy to arrive in style.

My photos do not do things justice sadly but, as my first wave made landfall and the Navy fliers picked out their first targets, we were off.  The objective was for the Navy to push inland and find the ‘Secret Plans’ that the British Science Division had stashed in one of the taller buildings on the second half of the table.

I suspect that this would have made a lovely demo game for our local game show ‘Campaign’.  We might have to consider this again if we get the time and have the energy to plan it.

The Navy pushed inland and quickly found the British rushing to the towns defence.

A few easy targets were taken out by my Navy Air Corps before they tried to move further inland.

The second wave was already arriving on the next Landing Craft and it would begin to get crowded on the harbour if the navy didn’t push on into the town soon.

Both tanks and artillery were present in the second wave, along with a second HMG team in their little steam launch.

As the British formed up in the town square, their jump troopers forged ahead and prepared for an attack from the rooftops.

After making short work of one of the Biplanes, the jump troopers found their retreat to be more difficult as they became pinned down by Navy rifle fire.

All this activity and rushing about was unnoticed by the Heavy divers who continued to plod on up the stairs of the harbour. Slow and steady wins the race!

The Navy tried to push through on their right flank but found the way congested and a British steam tank did nothing to help this along.

With more reinforcements arriving it was getting quite busy on the old quayside.

More effort was made on the Navy’s left flank and at first it seemed a way through might be found.

When the roads are blocked it is sometimes best to head over the rooftops.

Especially when a giant armoured bear and a steam giant come round the corner to stand in your way.

The British deployed their own Royal Air Force as they tried to hold the centre of the town.

In the end the US Rocketmen were able to reach the target building and secure the plans.  While the remainder of the US Navy force continued to be tied up fighting in the streets.

A great game that I would happily play again although my tactics would definitely be different. The artillery units, in a raid like this, proved themselves to be more of a hinderance than a help.  Failing to supply any of the covering fire they had been tasked with.

Steam Wars – Big Weekend Prep Continues

With our big weekend Steam Wars game looming, lots of work has been done with an added sense of urgency.  Sometimes this brings out the best in me, but it can also lead to me taking short cuts and simplifying things just to get things done.

Its odd how our perceived OCD in one area can be ignored in another (or when we don’t have time to think it through).  I have never been a perfectionist in my painting. Sometimes I get by with simple pant schemes and other times I can get very involved with a piece and spend hours trying new tricks on it.

This week its all about simple…

My work colleagues (mostly all ladies) seem to be able to multi task with little effort. I’m am less likely to multi task and more likely to ‘Start one thing – Stop – Start something else – Stop – Go back to the first thing – Stop…’  You get the picture?

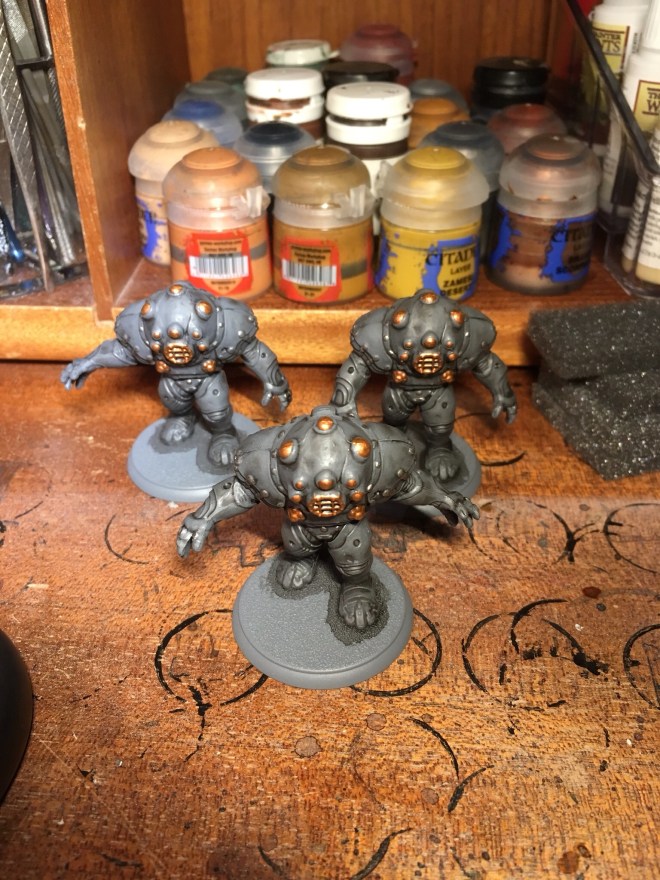
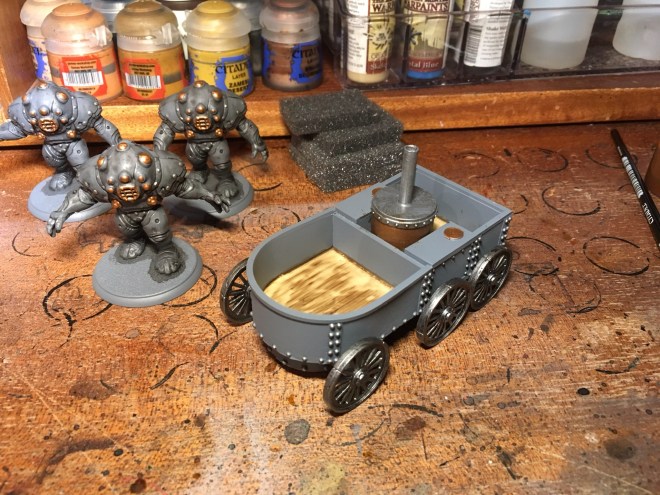
My painting table has been rotating from Heavy Dive Suits to Landing Craft to Walking Transport to Wheeled Transport.  As one wash dries on something, another colour is applied elsewhere, then as that dries, on to the next thing.  Its been quite nice actually.  Productive, as long as I don’t ask too much of the finished articles!

The one thing that has slowed things up is bloody rivets!  A side effect of playing a Victorian themed Steampunk game I guess, but why does everything have to have 200 rivets on it…

I know, it could be worse, I’m not painting tartan, or black and white checks I guess, but after 200 little silver dots I can’t always see straight.

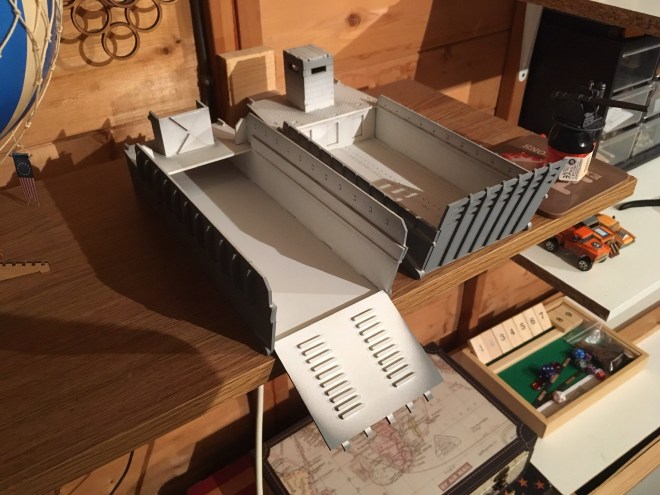
Thankfully the Landing Craft are rivet free.  They also lend them selves to a ‘2 can basecoat’.  Nothing to do with the Toucan, although I remember as a child being told a story about how that particular bird got its name and colourful plumage.  He found out the hard way that he couldn’t carry 3 cans of paint!

Anyway, the ‘2 can basecoat’ is as simple as it sounds.  Spray one colour on the top side (obviously its best then to let it dry) turn it over and spray the bottom with an alternate colour.  In my case white and grey.  Don’t worry if the colours bleed across slightly, that adds weathering and shading.  An effect that, if you were using a proper painting method, you would need to add in at another stage.

The second shortcut with these boats was the sponge and dirty paint water method. Allows you the pleasure of avoiding unwanted brush marks and leaves you with a lovely layer of staining under the fingernails if you were not wearing gloves…

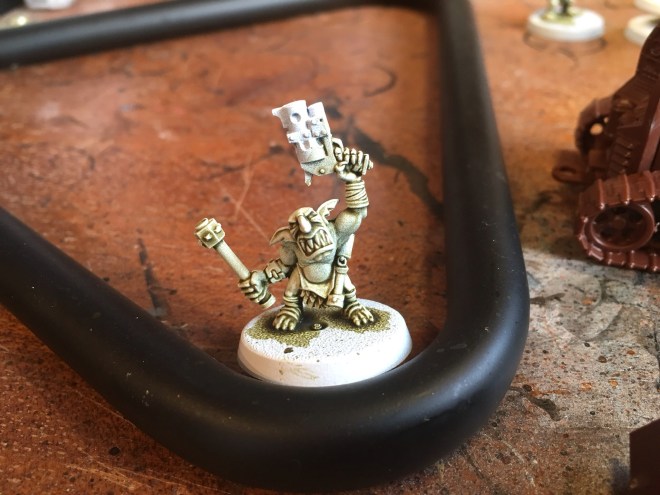
The usual sand and black edge completes the bases of any figures and adds a lighter look back to figures that can appear quite dark at first pass.

1/72 and 1/48 scale decals from the US Navy Goshawk model kit (easily available on eBay) finish the models off nicely.  I have used the same decals on every part of my Navy Force (I have been through about 4 sets of decals so far I think).

Loadouts for the Landing Craft have been planned to perfection and should allow me to get the best from the sea deployment I plan to use.

Snug but room for a few friends if needed.

Even the big guns and their tows are all but set for the off.

The Ironclad transports will be ready as well with the walker wading in and the wheeled car hitching a lift on a Lander.

The walking car also has a small gun that I picked up from a bits box at the Derby worlds game show a while back.  Just for self defence you know.

With that lot done I think I might even be ready…

Steam Wars – Planning For Our Largest Game Yet

With our second weekend planned for another larger game, I had only 7 days to get ready for what would prove to be our largest Steam Wars game to date.  The US navy would be deploying from the sea for the first time. If they were to do this successfully they would need plenty of transports that would allow the troops to come ashore safely.

Steam wars uses 5-6 men as a basic unit size, as such, it doesn’t need hordes of figures to get a good sized force together.  I had planned for an army of 3000 points but found that even a force that large left a lot of my US Navy army still in the box.  A normal game of Steam Wars is about 1000-1500 points a side.

So as to not choke the table with too many figures all at one time, the Navy was to deploy in 3 waves. Each deployed from their lovely new landing craft.

The landing craft are designs drawn up by Coronasan and cut by Jim at Products For Wargamers.  The first is the finished design and the second (slightly simpler design) is the initial prototype updated to be playable in our game.  Hopefully they will be available from Jims web store at some point.

The remaining forces were to be deployed from the Navy Steamer and their newest walking (and swimming) transport.  If I was to be ready for the game I had to sweet talk my own female cohort and talk them into me getting more time in the shed.

Thankfully, she who holds the keys is a kind and benevolent ruler and agreed to my requests, as long as a shopping trip was promised in the near future…